How to plant pre-sprouted ranunculus
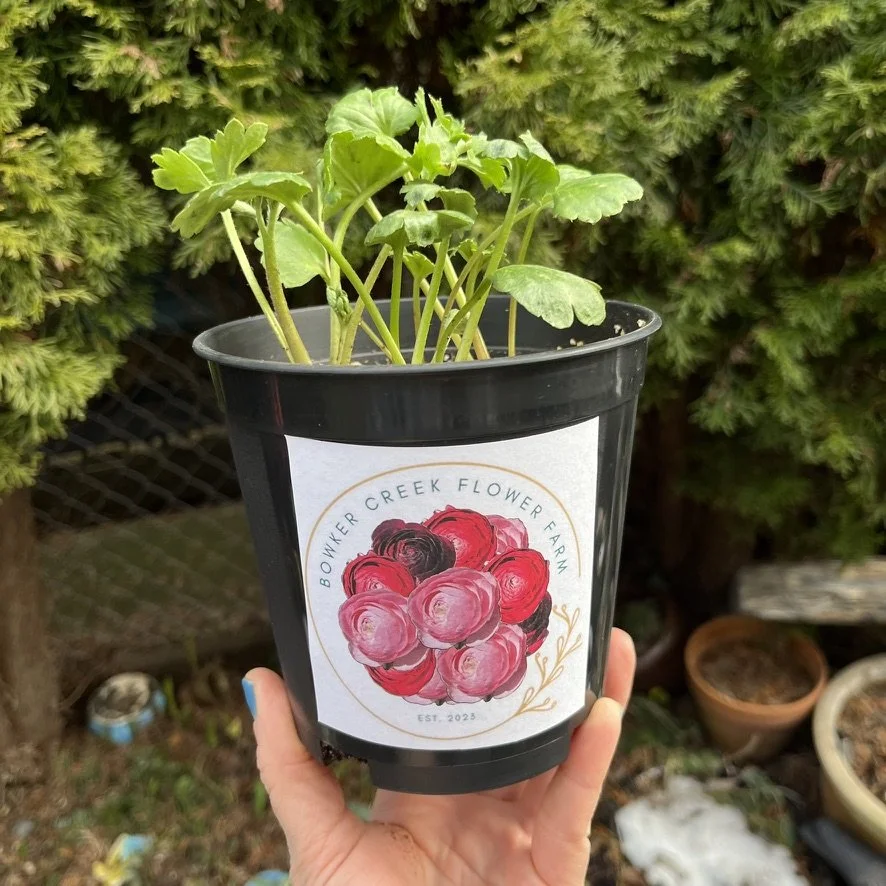
Whether you are growing your own corms this year, or have gotten your hands on one of my ‘Sweetheart’ Ranunculus Pots it’s time to plant them into their forever homes!
Now that the recent cold snap has ended, your pre-sprouted corms can be planted outside with success. Ranunculus really like a cool start, and can tolerate very low temperatures. They just don’t like to freeze and will rot if they do.
Pre-sprouted corms will have long, white roots, and either fresh pale yellow sprouts or full-blown green leaves. These little weirdos will each grow to a 12” spread, shooting up leafy foliage and strong stems that can reach 24” if they’re planted closely together.
If you’re planting pre-sprouted corms now (in mid-February in Zone 8b, which is 4 weeks before last frost for those in other climates), you will likely get flowers in April-May. It’s also not too late to start more corms now for a later harvest in May-June!
Below, I have outlined the steps involved in removing your pre-sprouted corms from their ‘sprouting pot’ and transplanting them to either your garden or their own pots.
As always, please reach out with any questions and I’ll do my best to answer.
Let’s Get Growing!
Renée
How to Transplant Pre-Sprouted Ranunculus
Prepare Your Planting Spot (…do this first!)
In A Pot: Each plant will need its own pot that is at least 8” deep and wide. Ensure the pot has a drainage hole as ranunculus don’t like soggy roots. Use cardboard or paper to cover the drainage hole on the inside to prevent dirt from escaping. Fill the bottom of the pot with 1” of drainage rocks. Fill the pot with re-hydrated organic potting mix. Dig a root-ball sized hole and sprinkle with 1/2 tsp slow-release organic fertilizer.
In the Garden: Each plant will need 6-10” of space. Plant in triangles of 3 that are 8-10” apart to make an impact in a border, or plant 6” apart to promote longer stems for cutting. Amend your garden soil by working in a sprinkle of slow-release organic fertilizer and 2” of organic compost to your planting spot. Dig a root-ball sized hole and ensure the soil is moist.


Remove Plants from Sprouting Container
Thread your fingers through/around the stems so you can grasp the entire pot opening.
Turn the pot upside-down into your palm.
Gently catch the group of plants as gravity helps release them from the pot.
Place the ball of plants on your work surface.
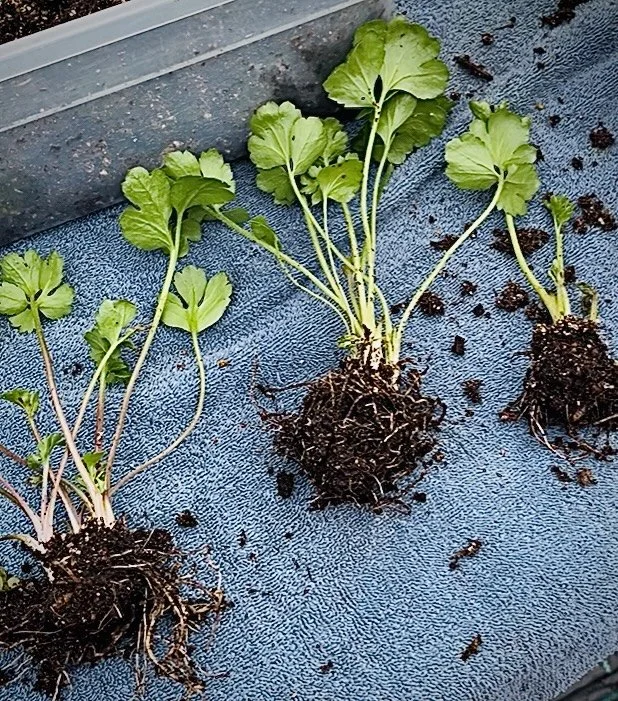
Separate The Plants
Gently remove extra soil from the root balls.
Grasp the sprouted plant by the root ball, being extremely careful not to squeeze or damage the corms. They are very tender and both the corm ‘tentacles’ and sprouts will snap off easily.
If the leaves of two plants become entangled, leave one on the work surface and turn the other upside-down, holding it by the root ball. Gently shake the plant so release each other. Don’t pull them apart!
Plant Your Plants!
Place the root ball into the hole you prepared.
Ensure you are tucking the roots under or around the ball as you settle it into place. Root tips that are pointing back up through the soil won’t provide nutrients to the plant and could introduce disease.
Push the soil firmly up and over the root ball to the base of the leaves/sprouts.
Cover the soil with a 2” layer of organic compost.
Water lightly to settle them in, and keep soil moist but not soggy.
Watch Them Grow!
I’d love to hear how it’s going for you. Leave me a comment here or follow along on Instagram with the hashtag #bowkercreekflowerfarm to show and tell!

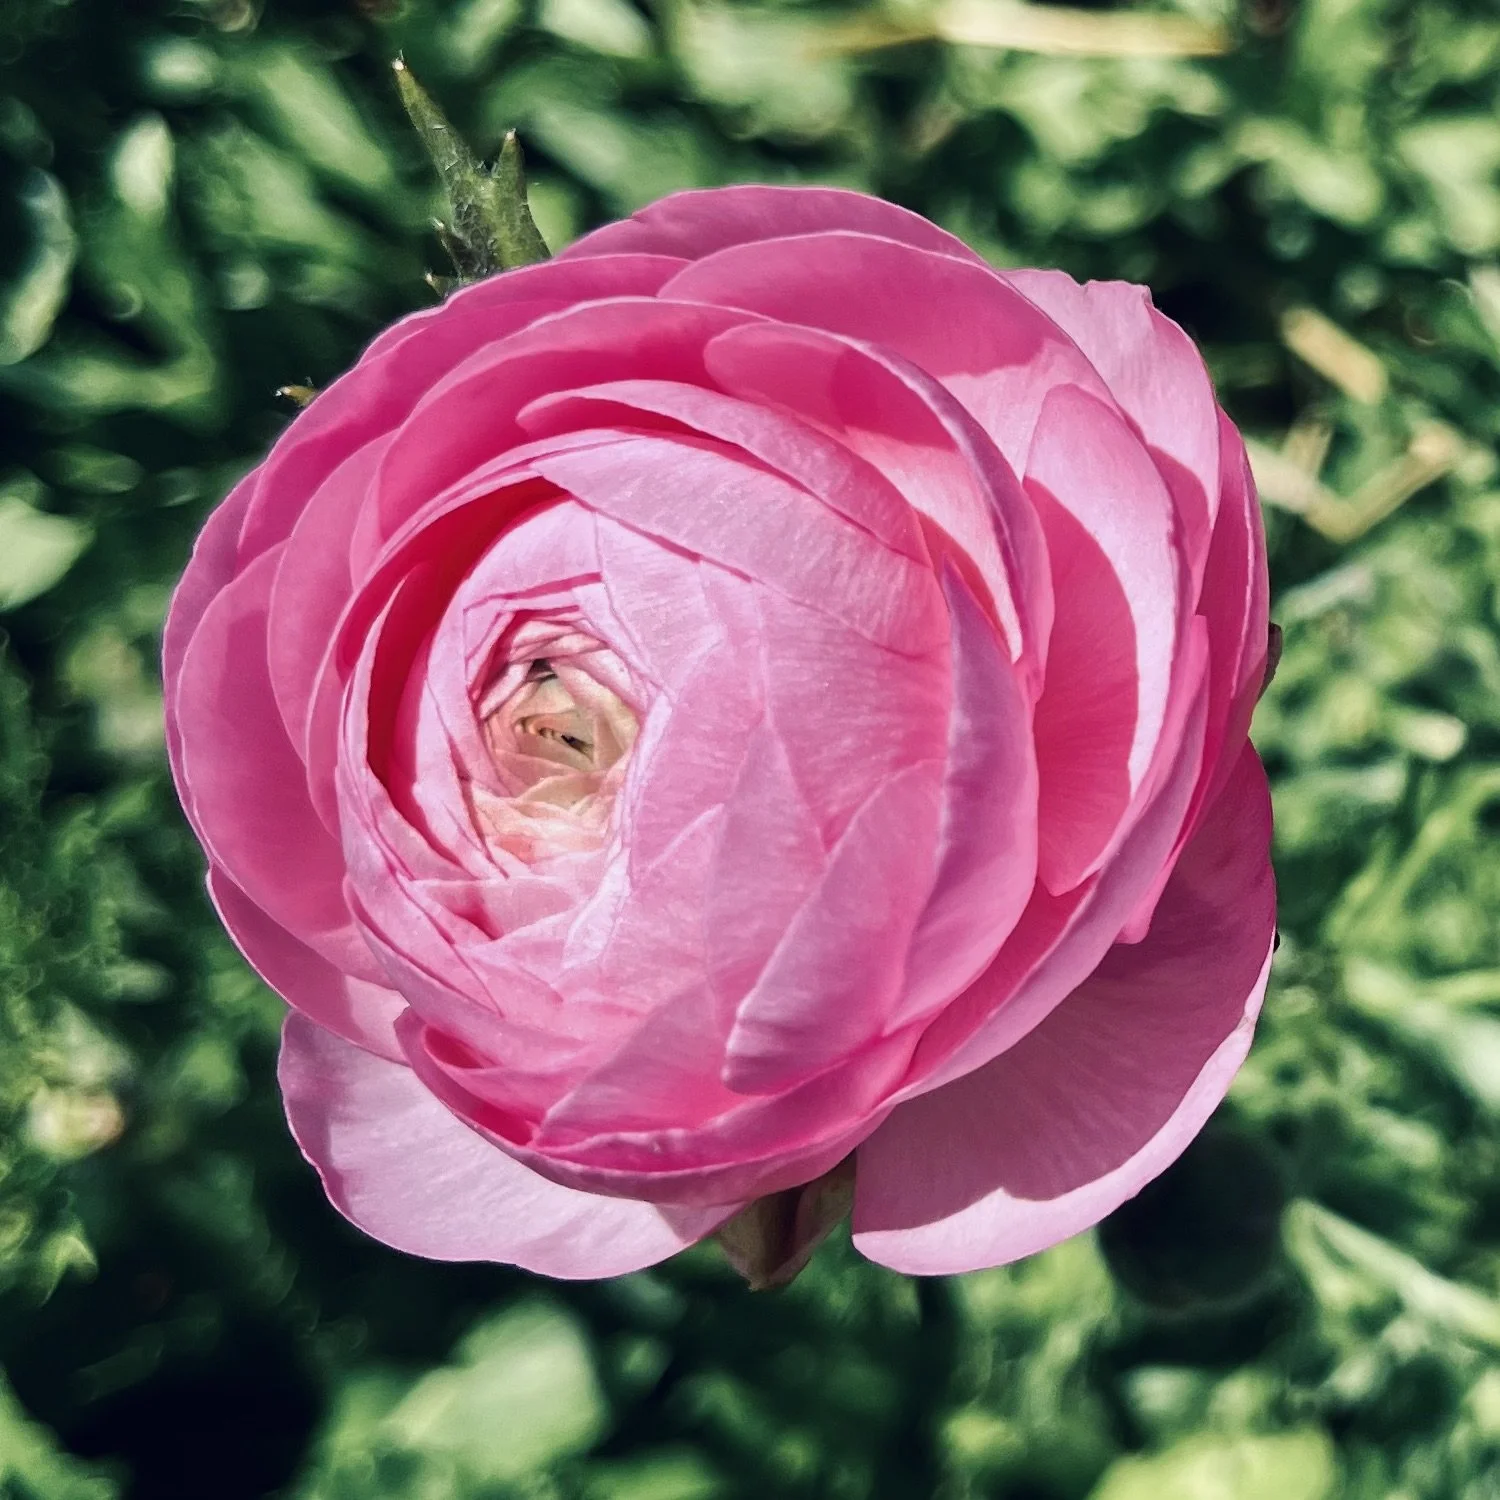
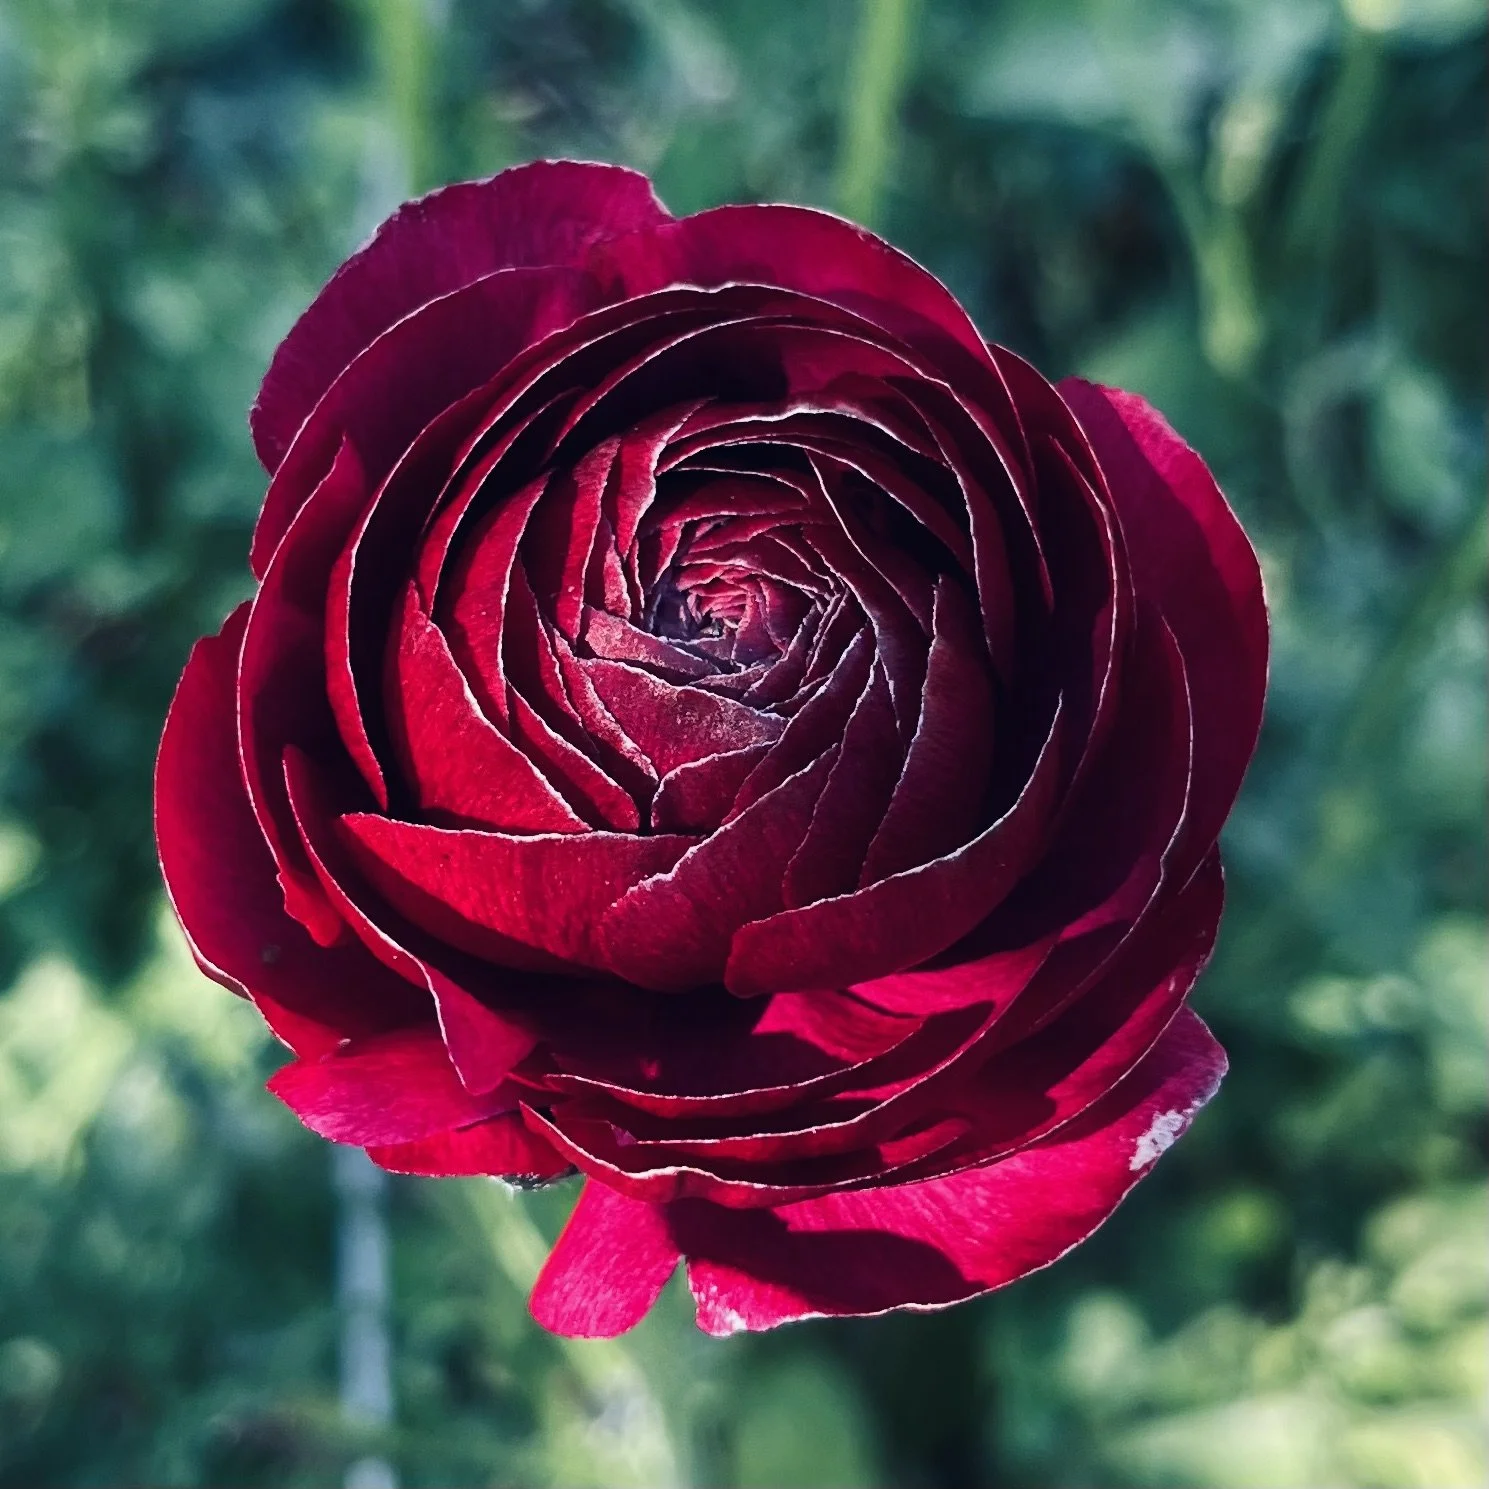
PS…I still have Sweetheart Ranunculus Pots available here for easy pick up at the farm in the Jubilee area of Victoria! Each pot contains all three varieties below: Amandine Marshmallow, Bordeaux & Rose Bon Bon. When planted as shown, each plant will produce 6-10 stems between April - May (caveat for Nature’s unpredictability).